Why throwing allies changes Disgaea's battle map
In the original Disgaea, lifting an adjacent ally and throwing it to a legal tile lets one unit extend another’s reach. The throw spends the thrower’s action, and each unit’s position and movement range still shape the route.
Coverage: Covers the original Disgaea’s lift, throw, stacked allies, movement limits, and action commitment; no story spoilers.
Lift an adjacent ally to open a route
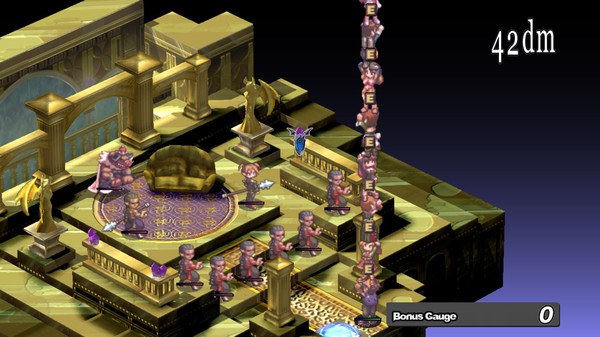
To throw an ally, first move the thrower next to that unit, lift it, then choose a legal tile within throwing reach. The destination can carry the ally across ground it could not cross with its own Move, but the thrower’s location and the available landing tiles still matter. Treat the move as a route planned by two units, not a free extension of the passenger’s turn.
For example, if a slower ally is short of a safe tile beyond a gap, a nearby unit can lift and throw it across if a legal landing is in range. The passenger reaches a position it could not reach alone; the thrower spends its action getting it there. If that thrower was needed to attack or occupy another tile this turn, the rescue trades that contribution for the crossing.
Stacks help with relays, not later-game tower moves
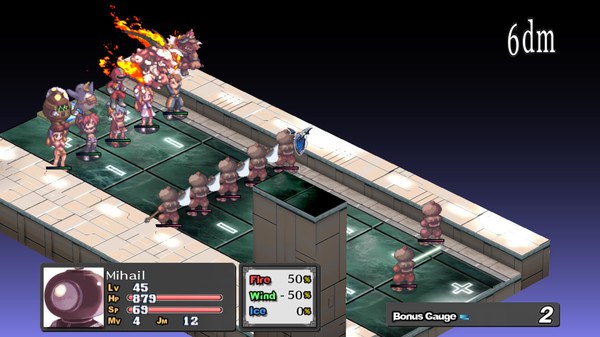
Held allies can be stacked, letting the party arrange several units for a sequence of throws. That arrangement can help relay a unit farther than its own Move would allow: one participant throws, then a unit in the new position may be able to continue the relay. Each step depends on the thrower’s position, range, and access to a legal landing tile, so plan the chain from the destination backward.
A stack is useful when its members can form a practical chain across the map, but it does not grant a separate tower movement system. The original Disgaea does not use later games’ Tower Attack or Tower Move mechanics. Think of stacked allies as units you can position and throw in sequence. Before lifting anyone, check where the chain ends and whether the units involved will still be placed to help once the relay is over.
Check the tiles and ranges before committing
A throw does not make every space reachable. The thrower must be positioned to lift the adjacent ally, and the destination must be legal and within throwing reach. The route may also depend on where other units stand. Use the map to identify a landing tile first, then decide whether moving the thrower into position costs more than the route is worth.
In a hypothetical crossing, suppose one ally cannot reach a useful tile on the far side of a stretch of map, while another can get close enough to lift and throw it. If the throw reaches a legal tile, the first unit crosses at the cost of the second unit’s action. If no legal destination is in range, add a relay only if another unit can occupy a useful position and continue the sequence. That turns a vague plan to “throw across” into a set of checks: adjacency, range, landing, and the next participant’s position.
Spend the thrower’s action deliberately
Lifting and throwing spends the thrower’s action. Once it has performed the throw, you cannot also use that unit’s action for an attack as if transportation had been free. The passenger’s improved position may still be worth the trade: it could escape danger, reach an objective, or put pressure on an enemy. Judge the result by what the party can do from the new positions, not by distance alone.
When planning a rescue, compare the passenger’s immediate need with the thrower’s other job. If the ally is stranded in danger and a legal throw puts it somewhere safer, committing the thrower can preserve the unit and improve the formation. If the passenger is only moving a little closer to a target, keeping the thrower available for its own action may matter more. Each throw changes the map by converting one unit’s action and position into another unit’s reach.
Primary work & further reading
Primary work: Disgaea. Character and story readings are editorial interpretations. The publisher reference below identifies the work and its premise.